Showing posts with label How To. Show all posts

Tuesday, September 11, 2012

Greetings [with Emphasis on Pronunciation]

Hey guys! After a momentary pause in blogging (what else is new) I am back! I will Probably only be posting periodically rather than on a continuous basis because this year is my senior year of high school and I am taking my most rigorous schedule up to date. I have no study halls and a bigillliooonnnn college apps to fill out so maybe by January things will get back to normal.

Today I stumbled upon a really helpful blog posted by Lauren Conrad about pronunciation of high end fashion. If your like me and you pronounce net-a-porter(.com) as net-a-poter, then we have big issues! Please read and learn these pronunciations, they will save your butt. [Oh and by the way it is net (as in a fishing net) -a- (as in 'ahh' like when your relaxing) por (as in a pore on your face) te (tay, the e is kind of drawn out)].

Lauren Conrad: Most Mispronounced Words in Fashion

this one is also very helpful and has about every fashion designer you could ever need to pronounce:
How to Pronounce Common Designer Names


Enjoy xo
Heather

Saturday, February 25, 2012

psstt. White Jeans AFTER Labor Day

I suppose this title is a little misleading, I guess it should be "White Jeans....AT ALL." White jeans are really risky, confusing, and can very easily turn trashy if worn incorrectly. 


(I'm on the left... obviously because I'm wearing the white jeans)
(I had to crop my head out of this one, but its just to give you a better look at my outfit)

These pictures are actually from October, so this is more of a "fall white jeans" look rather than spring. But just like my Christmas list I figured better late than never! Essentially my approach to white jeans is muted colors. Sure there are some people who will go for the ultimate blanc look, or the bold color look. But for a teenager, and specifically a high schooler it is safer to add color, rather than wash it out (although personally I would never wear white jeans to school). 


Some quick white jean rules:

1. DO NOT buy a pair of jeans that hugs your every curve. It is so trashy to wear white jeans that are essentially jeggings.
2. THONGS AND NUDE UNDERWEAR ladies and (gentlemen)!! We are not a walking peep show. It is possibly the biggest, but most avoidable mistake you can make.
3. USE JUDGEMENT when planning a white jean outfit. Don't wear your furry lace up wedge boots, or a animal fur jacket. White jeans are special, they are a statement within themselves, there is really no need to go "all out". 

(Stephanie Pratt wearing a white jean outfit that strangely resembles mine, which was completely coincidental) 

(Cindy Crawford d0ing a bright spring white jean look)

(Whitney Port)

(Lauren Conrad... sensing a "The Hills" trend)

(Ashley Tisdale)

(November 2009 Madewell Lookbook)

(Kirstin Cavallari)

(Sarah Jessica Parker, one of my favorite outfits)

(Ashley Tisdale, an example of the ultimate blanc look)


*PS most of these pictures of the celebrities are pretty old.

xo
Heather

Monday, June 27, 2011

Summer 2011 Travel: How To Pack For Over Packers

HOW TO PACK (From the personal experiences of an over packer):

  1. Make a list of everything you are bringing. I promise you this helps. I had my list made by April because making a list last minute leaves room for mistakes. If you make the list before you go away and re-visit the list as you realize what you truly need then your list will have no holes.
  2. Pack only what you need. This is where most people go wrong (including myself, trust me I know how it feels to need to pack your whole life and everything you own into one suitcase for a week, but I've gotten better at it). Start with necessities: undergarments, toothbrush, toothpaste, face wash, deodorant, ect (things you cannot live without, that are purely necessities). Then continue by packing clothes.
  3. Consider climate and what you will be doing on your vacation. Will you be hiking in the Alps, or lounging by the pool? Do you really need to bring your uggs with you to California? or can you afford to leave them at home?
  4. Consider the length of your stay. Are you staying for a weekend, or are you staying for a week, or are you staying for a month? 
  5. Consider what you need most/your clothing habits. Is their a clothing item that you use everyday (for me its baggy t-shirts and soffe shorts which I wear as pajamas, I have a weird habit of wearing a new shirt and new soffe shorts everyday, which means I need to pack more of that than other items)
  6. ROLL YOUR CLOTHES, don't fold. Rolling saves a lot of room in your suitcase.
  7. Dont forget the weight policies when you are traveling by plane. For many/most flight companies an overweight suitcase is extra money, I've had to pay 50$ for a suitcase overweight even by 2 pounds.
  8. Try and find a suitcase that isn't very heavy. It is true that the sturdier more reliable suitcases are heavier but there are many suitcases that are lighter which wont compromise the reliability factor. This in the end will help meeting the weight requirements if you are traveling on an airplane.  
  9. Remember that no matter how much you pack you will most likely be missing something. BREATHE. Airports sell almost everything and even on some flights they sell items. If not you can always buy your item at a store in the country, unless you are traveling somewhere remote, or under-developed.


Wednesday, June 15, 2011

Marble Nail Polish Trend: How To

Hey Girls and Guys. Yesterday I spent 2 and 1/2 hours trying to figure out how to do the marble nail polish trend. Eventually I figured it out, and I have some tricks and techniques and tips to share with you.

What You'll Need:
1. A small cup that you can get dirty (the nail polish will stain the sides)

2. Room temperature water (to put in the cup)

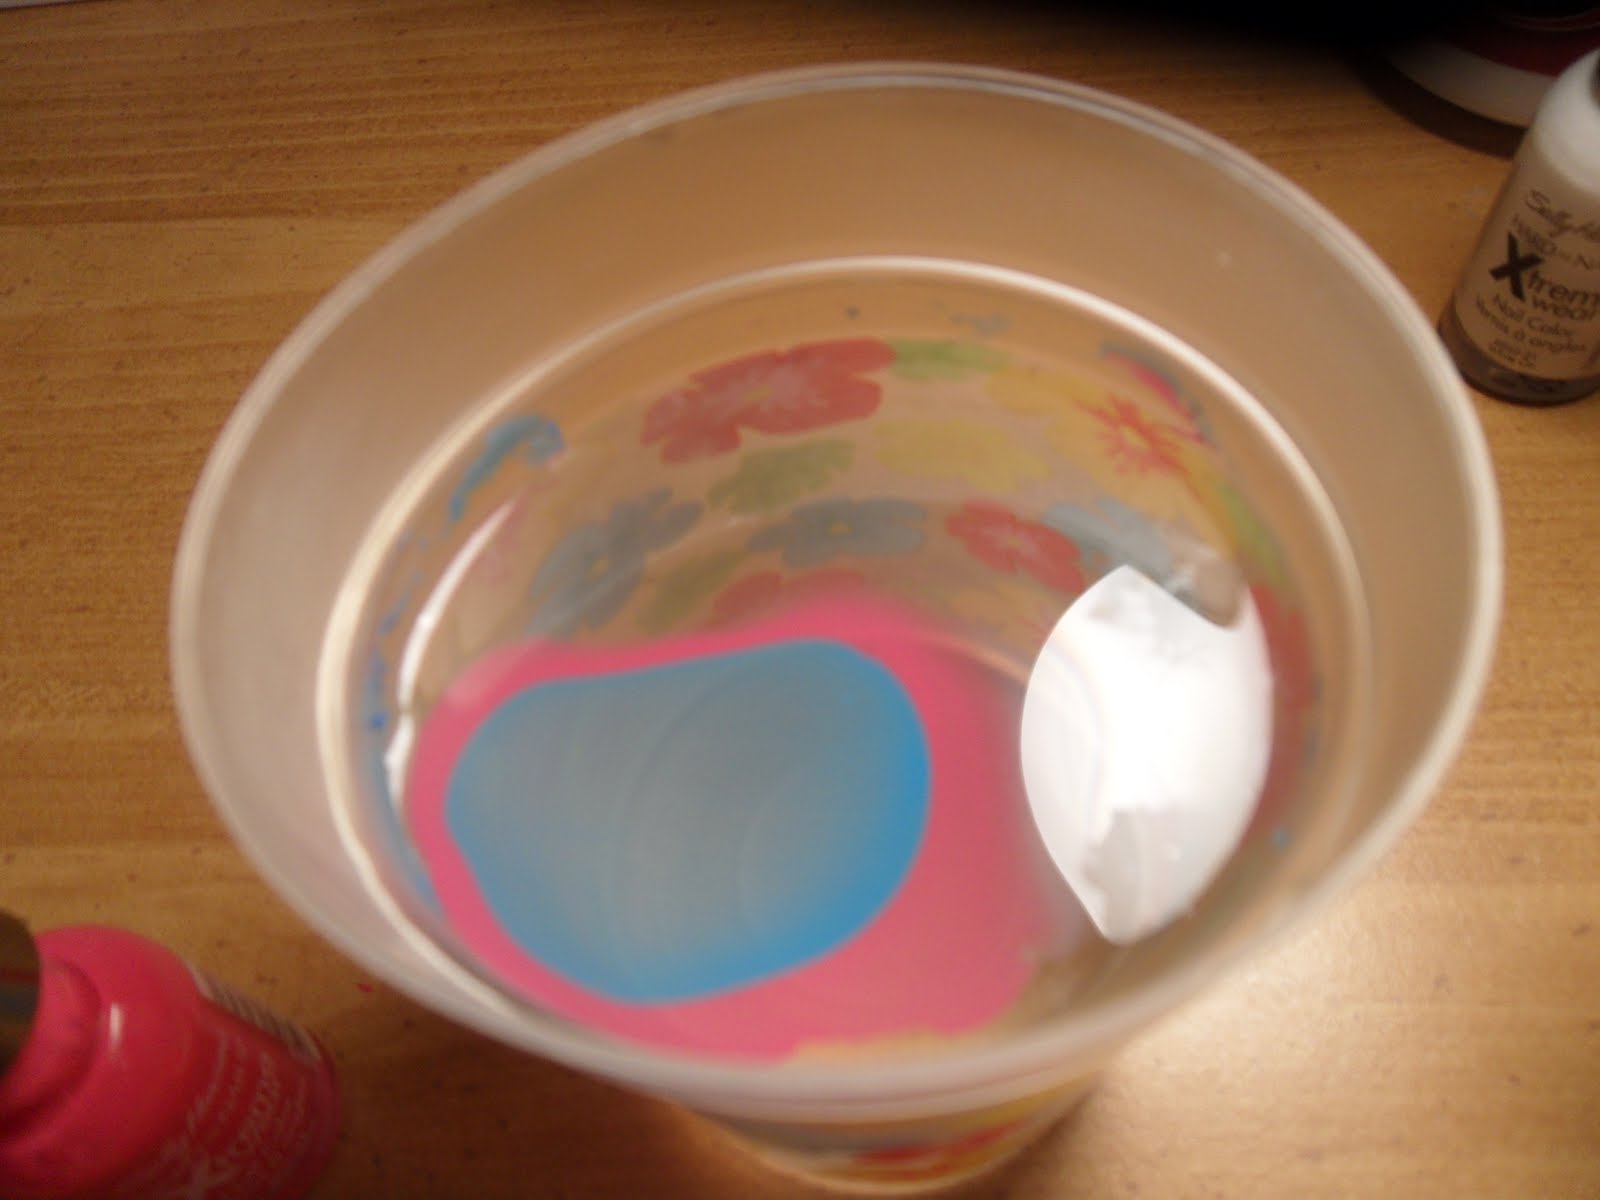
3. Two of your favorite nail polish colors (you can use more colors once you get the hang of it, for beginners I recommend two) (I used pink and blue)

4. Your base color, or a clear top coat, or nothing, which ever you prefer (I used white)

5. A stick/pen that you can get dirty

6. Optional (but very helpful): Tape


STEP 1: Apply your base color coat (I used white, but feel free to play around with colors, or just use a clear nail polish)
STEP 2: Apply tape around your nail so that if covers all the skin directly around your nail, but not the nail itself. This makes clean up a lot easier.
STEP 3: Add your first nail polish color to the water, it will expand into a blob as seen in the picture below (the pink) then add your second color on top (the blue) it will also expand
STEP 4: (You need to act relatively quickly so that your nail polish doesn't dry) This part gets a little tricky. What your going to do is angle your nail towards the nail polish blob, and the section you want on your nail. Then as if your scooping/pushing the nail polish down your nail takes the nail polish and is completely submerged in the water. With this said just leave it their don't move, and don't try and pull it out, just leave it submerged.
STEP 5: Now your going to take your pen/nail stick and put it in the water and allow it to catch all the excess nail polish still floating on top of the water, allow the nail polish to wrap around it, make sure you still have your nail under the water so that the excess nail polish doesn't get on it.
STEP 6: Now simply pull your finger out and you should have a unique design on it. The nail dries very quickly so it should be dry within the first few seconds you take it out of the water, but you should still be careful with it. Now remove the tape.
STEP 7: Done. You should now have beautiful, interesting nails. Below is what mine turned out like, its still a work in progress...

I hope you found this helpful, if you have any questions feel free to comment. Did you try this trend? Comment and tell me how it went!


Tips:
  • If you are trying this for the first time, make sure you have time and that your not in a rush to go out, it may take a while for you to figure out. For people like me, its going to take 2 1/2 hours. 
  • Also make sure to apply a top coat afterwards, the design chips very easily.