Hey Girls and Guys. Yesterday I spent 2 and 1/2 hours trying to figure out how to do the marble nail polish trend. Eventually I figured it out, and I have some tricks and techniques and tips to share with you.
What You'll Need:
1. A small cup that you can get dirty (the nail polish will stain the sides)
2. Room temperature water (to put in the cup)
3. Two of your favorite nail polish colors (you can use more colors once you get the hang of it, for beginners I recommend two) (I used pink and blue)
4. Your base color, or a clear top coat, or nothing, which ever you prefer (I used white)
5. A stick/pen that you can get dirty
6. Optional (but very helpful): Tape
STEP 1: Apply your base color coat (I used white, but feel free to play around with colors, or just use a clear nail polish)

STEP 2: Apply tape around your nail so that if covers all the skin directly around your nail, but not the nail itself. This makes clean up a lot easier.

STEP 3: Add your first nail polish color to the water, it will expand into a blob as seen in the picture below (the pink) then add your second color on top (the blue) it will also expand
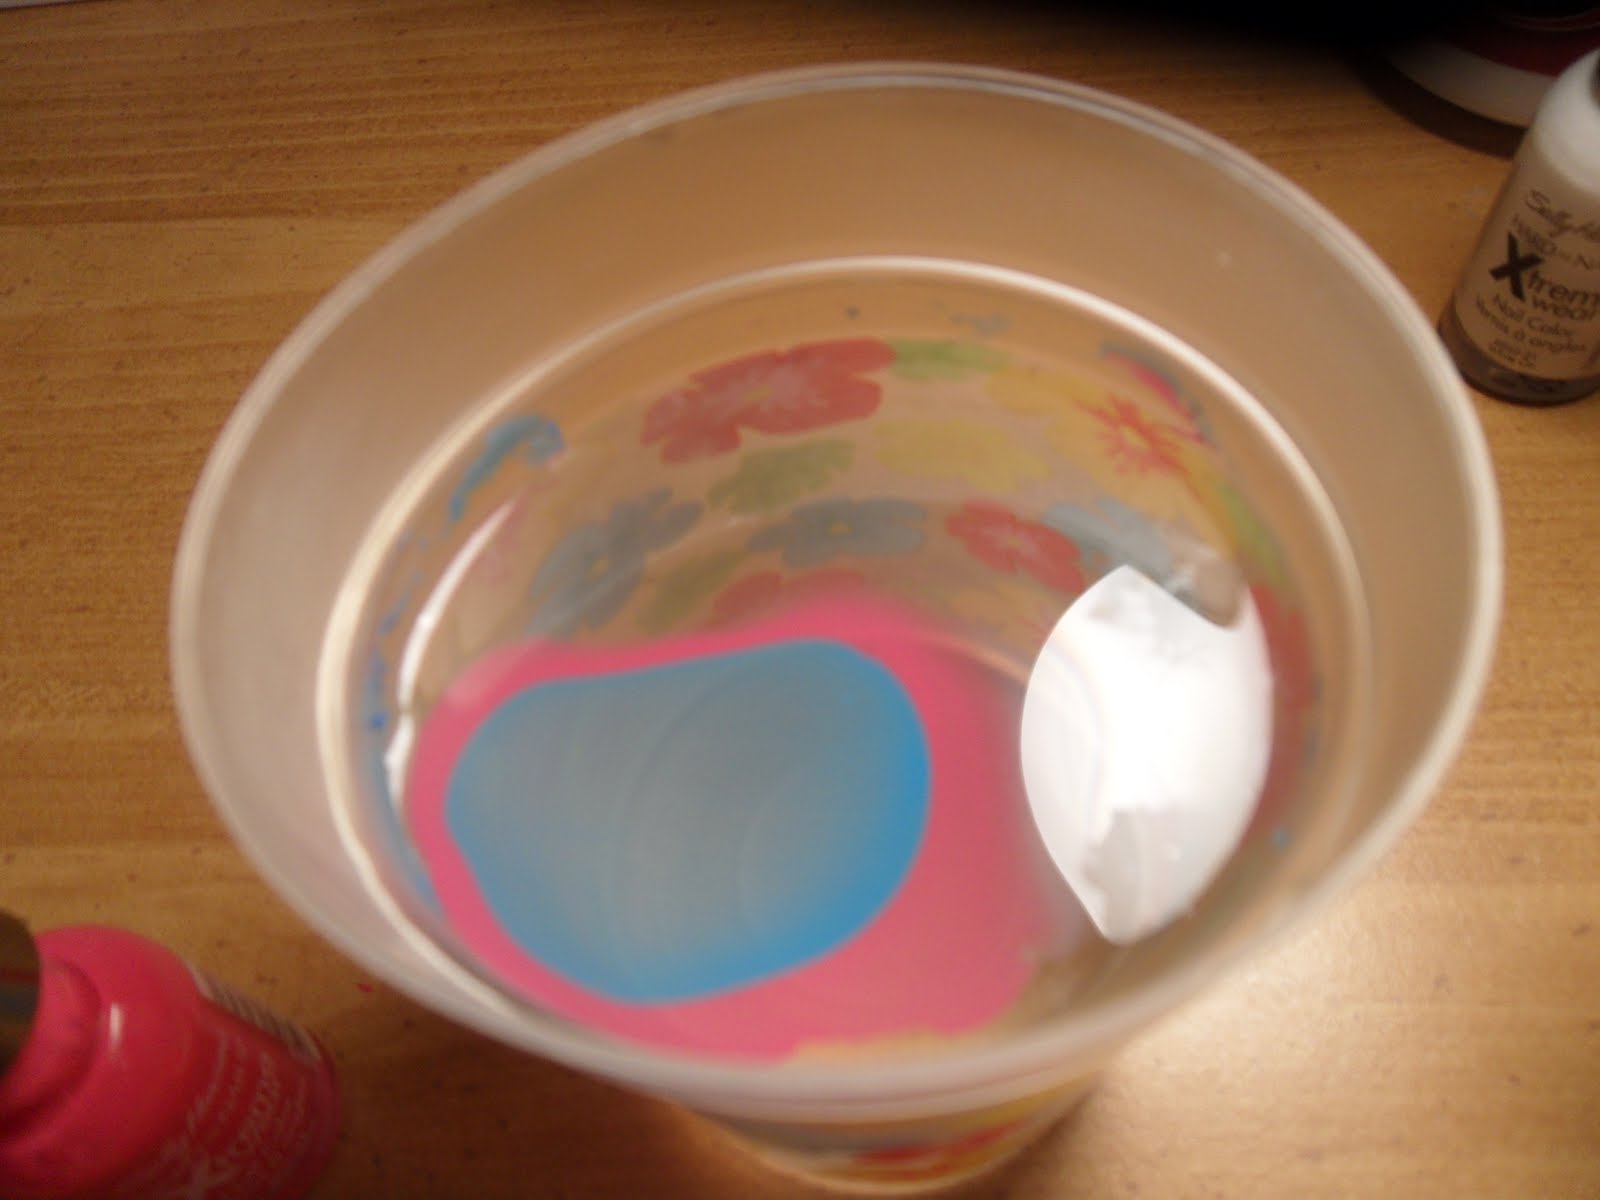
STEP 4: (You need to act relatively quickly so that your nail polish doesn't dry) This part gets a little tricky. What your going to do is angle your nail towards the nail polish blob, and the section you want on your nail. Then as if your scooping/pushing the nail polish down your nail takes the nail polish and is completely submerged in the water. With this said just leave it their don't move, and don't try and pull it out, just leave it submerged.


STEP 5: Now your going to take your pen/nail stick and put it in the water and allow it to catch all the excess nail polish still floating on top of the water, allow the nail polish to wrap around it, make sure you still have your nail under the water so that the excess nail polish doesn't get on it.

STEP 6: Now simply pull your finger out and you should have a unique design on it. The nail dries very quickly so it should be dry within the first few seconds you take it out of the water, but you should still be careful with it. Now remove the tape.

STEP 7: Done. You should now have beautiful, interesting nails. Below is what mine turned out like, its still a work in progress...

I hope you found this helpful, if you have any questions feel free to comment. Did you try this trend? Comment and tell me how it went!
Tips:
- If you are trying this for the first time, make sure you have time and that your not in a rush to go out, it may take a while for you to figure out. For people like me, its going to take 2 1/2 hours.
- Also make sure to apply a top coat afterwards, the design chips very easily.
No comments:
Post a Comment